Docker & Kubernetes Project
Hello Everyone, welcome to my blogging channel. Here, I simplify concepts for beginners. If you want to just follow the tutorial and clone the project for your resume, I simplify that process for you by making you understand the concepts. But, if you want to choose the other way around like you are learning skills to optimize the cost and build something. That's what an engineer would do. Please follow.
Hello Everyone, let us make a project from which we can get practical knowledge of all Docker and Kubernetes concepts and their commands.
So, let's get started.
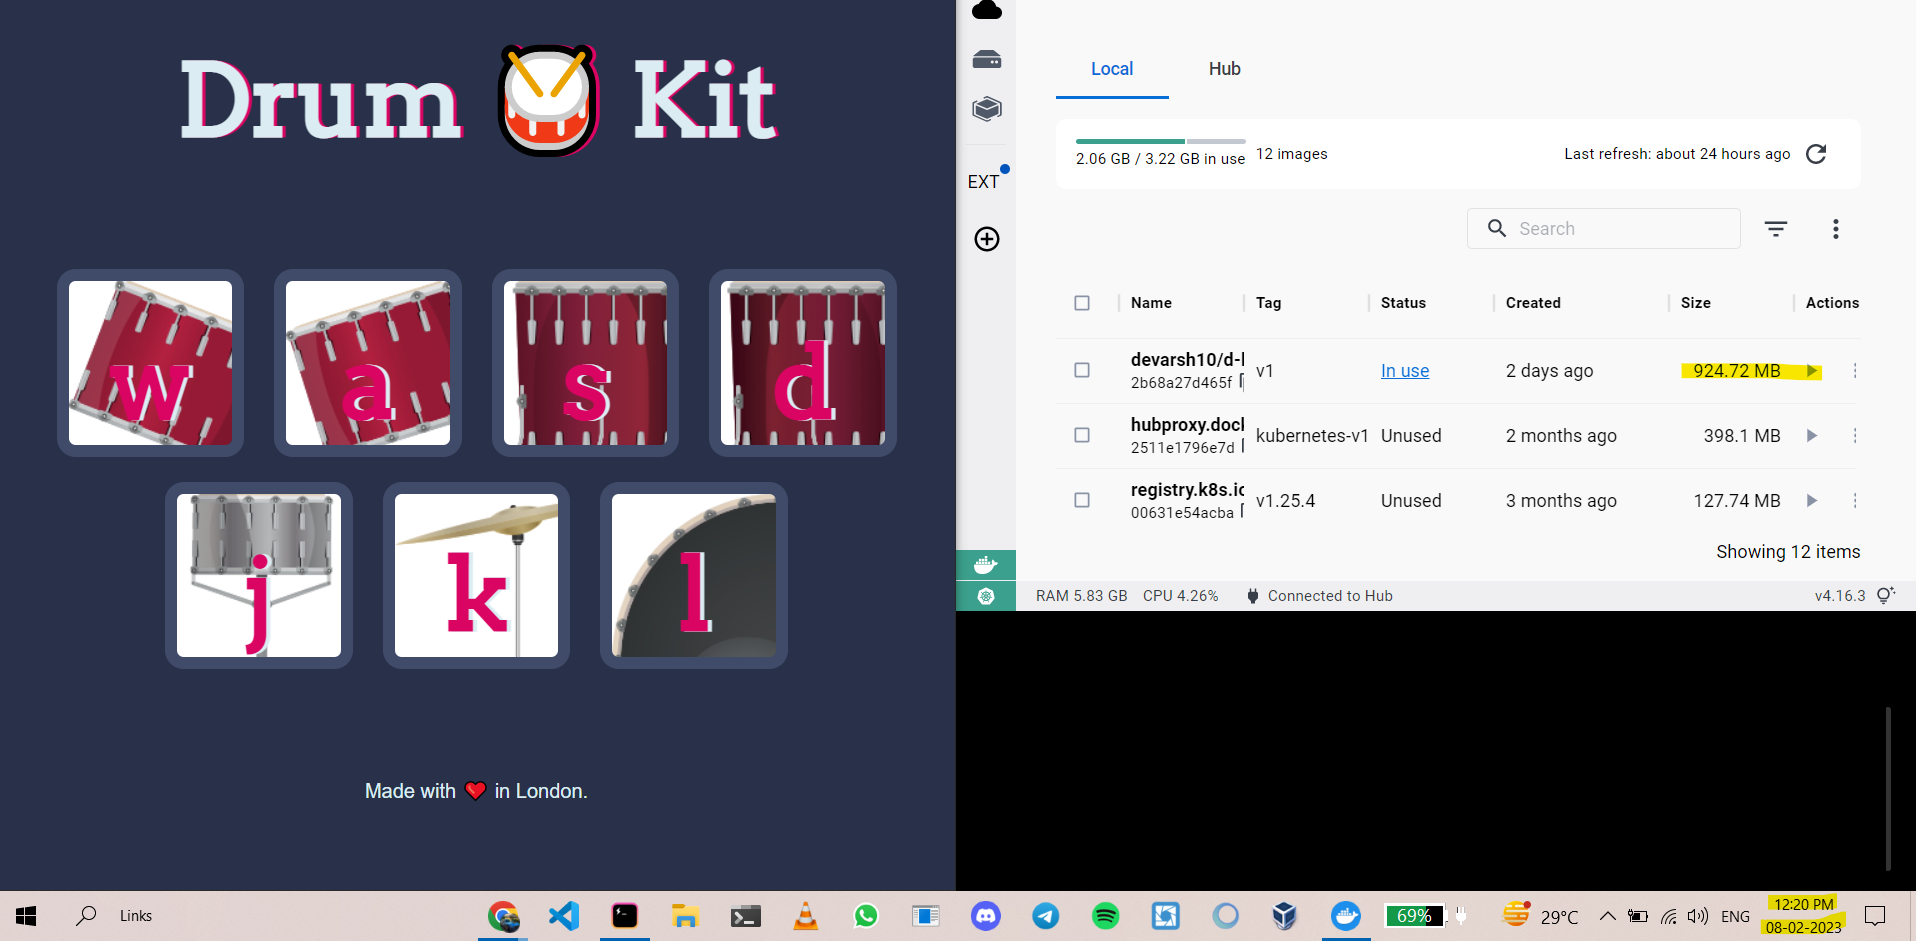
Final Result

Reference: https://github.com/himanshurajofficials/Drum-Kit
Note: If you found this blog lengthy on doing this hands-on. Just Divide the topics into two parts: 1.) Deploying app using Docker 2.) Deploying using Kubernetes.
Deploying app using Docker
Create a Dockerfile
Using this we can give a script to Docker when we want to run our app.
Create Dockerfile using
vim Dockerfileornano Dockerfile(vim & nano will create the file if it does not exist).
Then write the following script in the Dockerfile.
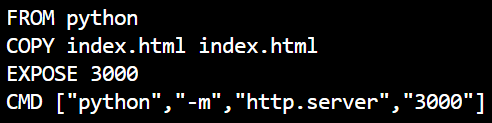
 FROM python
 COPY index.html index.html
 EXPOSE 3000
 CMD ["python","-m","http.server","3000"]
Then, exit vim using -> escape -> :wq
If in nano -> Ctrl + X -> Y -> Enter
Then build the Docker Image using
docker build .command.Here, docker build . will build the docker image. But to name the image and add the version to the image we have to run the command
docker build . -t ImageName:ImageVersionHere, prefer to write
dockerhubAccountName/ImageName:ImageVersion. This will help you when you will push the Image to the docker hub.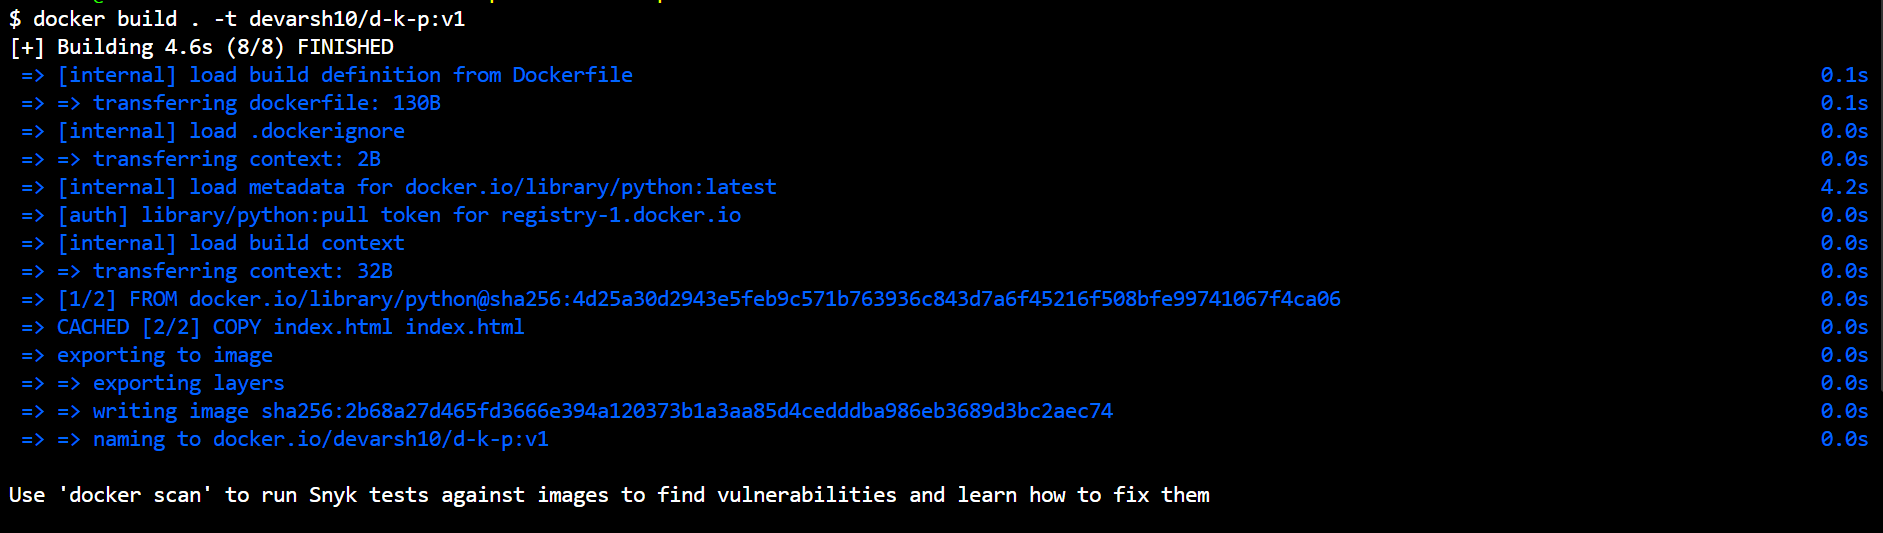
To check the images run the command
docker imagesand you will see the image we just built.
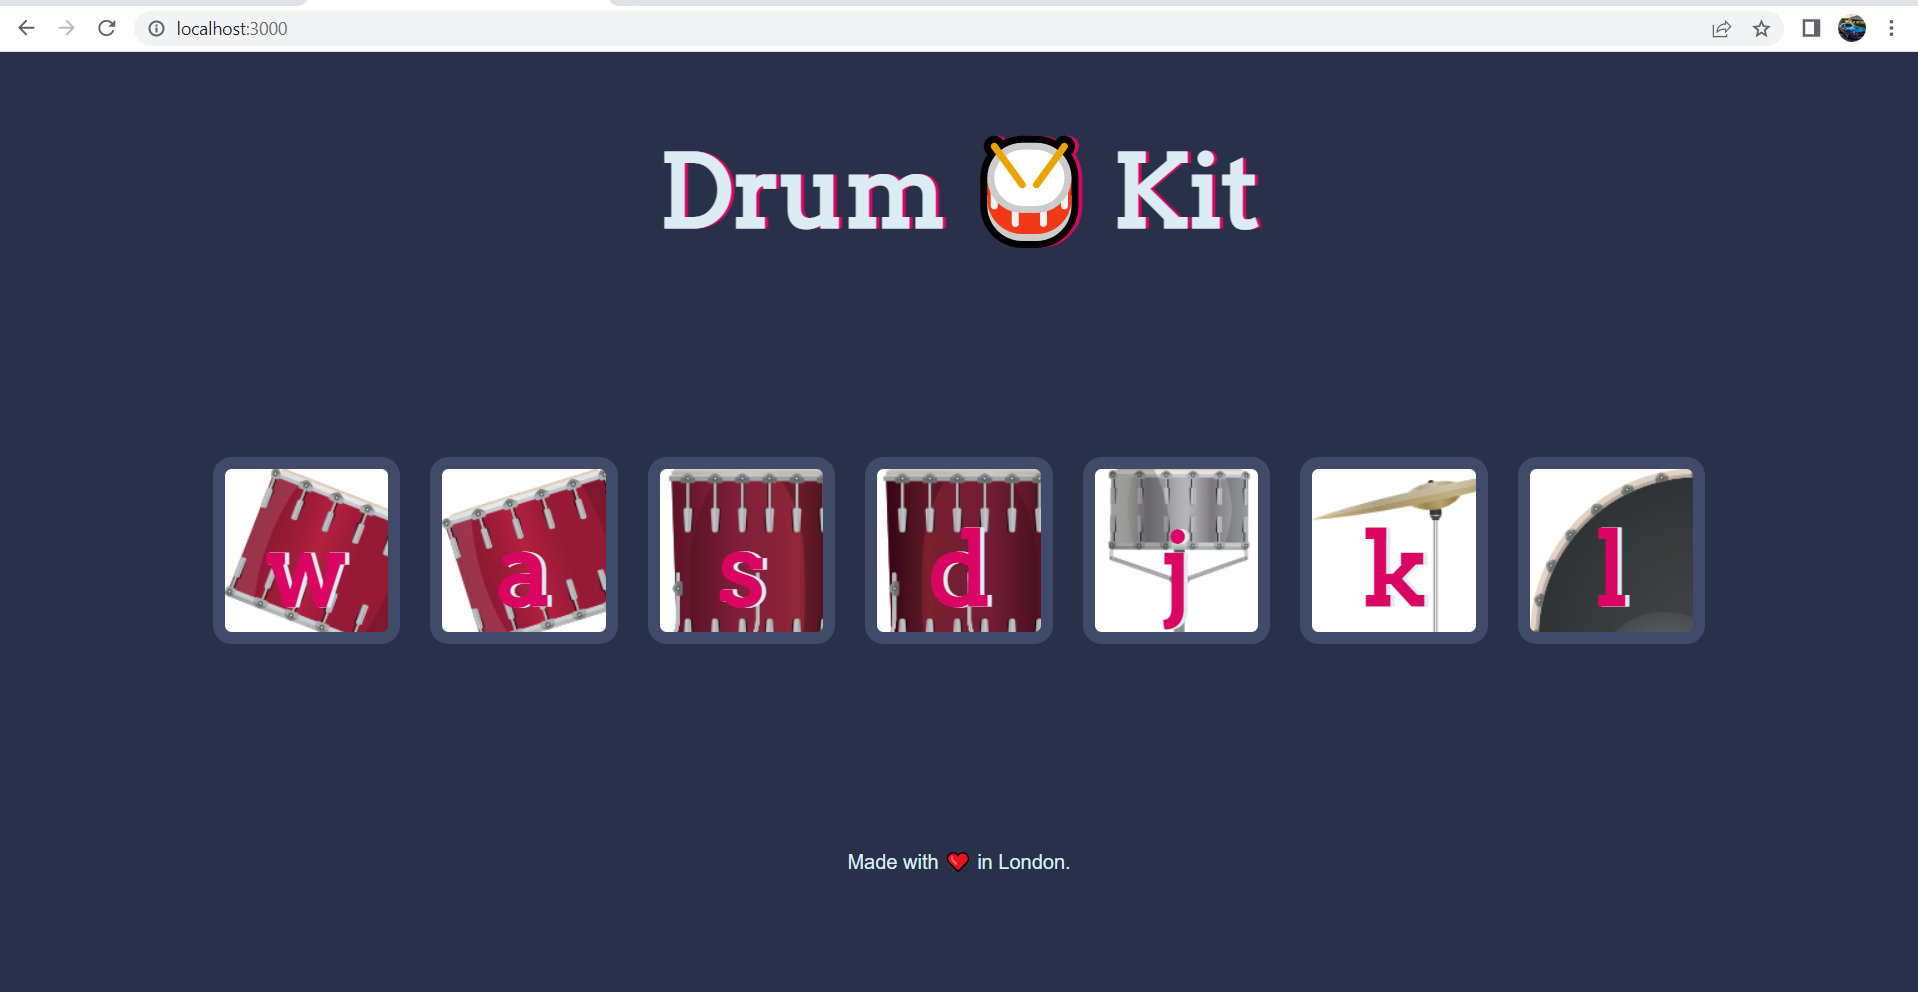
Finally, let us run the command to run our app.
docker run -d -p 3000:3000 <ImageId>||docker run -dp 3000:3000 <ImageId>Here, we can also write -dp.
Here, -d means Detached mode which means the app will run in the background.
Here, -p means the port, on which our app will be running.

Now, in the browser's search tab run port 3000.
http://localhost:3000.The app must be up and running.
Now, our app is up and running. So, you might be thinking, that
Q: What is the use of K8s if we can run our app using docker only?
Ans: Because, if we stop our container our app will be down. So, for availability & scalability, we need K8s. There are other reasons too of using K8s. But let us consider this for now.
Deploy using K8s
First of all, start minikube cluster. If not installed install it. Otherwise, you will not be able to use the command kubectl.
Now as I said to name the image in the format DockerHubUserName/ImageName:ImageVersion we will use this to push our docker image to the docker hub.
Push Image to Docker Hub. Using Cmd:
docker push <ImageName:ImageVersion>.If it throws some error, run cmd:
docker login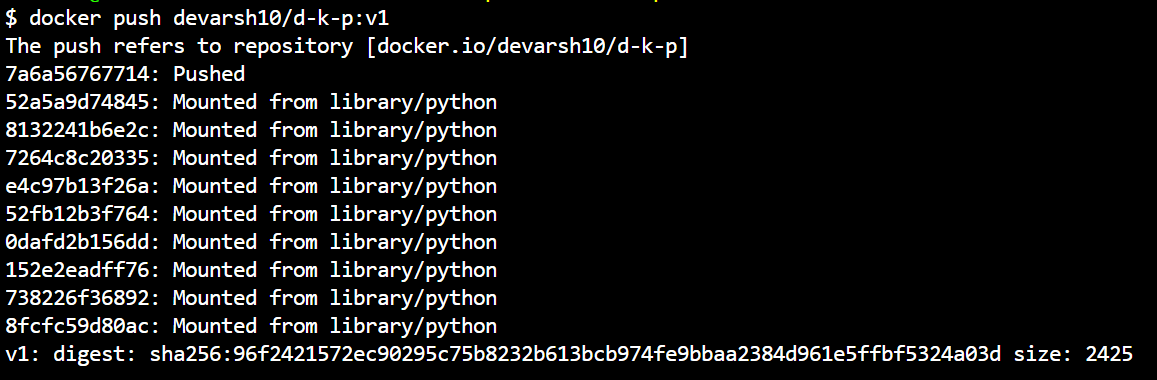
After the push, in the Drum-Kit library create a folder and name it "k8s-data" or "k8s"(using the command: mkdir k8s) which describes that this folder contains only k8s elements like pod or deployment file.
Deploy using Pods.
Then,
cd k8s-> create a pod.yaml file in the k8s directory.And write this code snippet in it.
 #This file is available on Kubernetes pod manifests files. Just copy paste it.
 apiVersion: v1
 kind: Pod
 metadata:
   name: d-k-p #Keep name as you wish.
 spec:
   containers:
   - name: d-k-p #Keep name as in metadata.
     image: devarsh10/d-k-p:v1 #Here write image name with the name you push your image to Docker hub
     ports:
     - containerPort: 3000
Now, using the command kubectl apply
-f pod.yamlcreate a pod. The output will be like this:
Then, check whether it's running or not. Maybe you get some error named "ErrImagePull" or "ImagePullBackOff" Error. Then, check your internet connection. Or delete the pushed image from the docker hub. And again push it.
To check, that pod is running or not? Run this command:
kubectl get pods --watchorkubectl get pods. The output will be like this:
(Note: Here, ignore the Status: Failure. It occurred because my laptop screen got turned off.)
Now, here as you can see, Pod is running -> Drum-Kit is running.
The docker image is not running. Meaning, this app ran by our pod manifest file. Not by the command
docker run -dp 3000:3000 <ImageId>.Hence, this is how we can deploy our app on production.
Deploy using the Deployment file.
Now, we just deploy our app using the pod. But what if, our pod gets deleted by someone using the command:
kubectl delete pod <podName>. Then, it'll be a reason to worry.
This will happen. If the pod gets deleted.
So, to keep our pod up and running, we will need a controller which constantly monitors our pod. So, that's where we need deployment. So, we'll be needed a deployment file.
So, let's back to our terminal and create a deployment file.
Just run the command in the K8s directory:
nano deploy.yamlAnd paste this deployment file:
 # This file is also available on: https://kubernetes.io/docs/concepts/workloads/controllers/deployment/
 apiVersion: apps/v1
 kind: Deployment
 metadata:
   name: d-k-p-deployment
   labels:
     app: d-k-p
 spec:
   replicas: 1
   selector:
     matchLabels:
       app: d-k-p-sl #Keep in mind to keep this name same. This one.
   template:
     metadata:
       labels:
         app: d-k-p-sl #And this one.
     spec:
       containers:
       - name: d-k-p
         image: devarsh10/d-k-p:v1
         ports:
         - containerPort: 3000
Further, run the command
kubectl apply -f deploy.yamland check it's running or not using the command kubectl getdeployments.
Now, our app must be running on port 3000. Like,

Now, if you delete the pod. The controller(deployment) will monitor this. And using Auto-Healing, it'll restart the port.

Conclusion
We ran up the app using docker, then using pod and deployment manifest in minikube cluster. Now, further, we can make our app externally available using Port type = NodePort.
That's all.
Reference:
I would like to give a huge shoutout to Abhishek Sir and Shubham Sir as they both started this great hands-on project series.

