

Introduction of Project
Hey Everyone, in this project we will understand Docker Networking by deploying a three-tier application on a custom Docker network.
So, Let's get started.
Kickstart Your AWS EC2 Instance
Step 1 -> First of all, launch an EC2 Instance by keeping all the settings by default.

Step 2 -> Keep the HTTP and HTTPS Protocols checked. So, that we do not have to add it while working with HTTP port 80.
Note: The default port of HTTP is 80 and the nginx's default port is also 80.

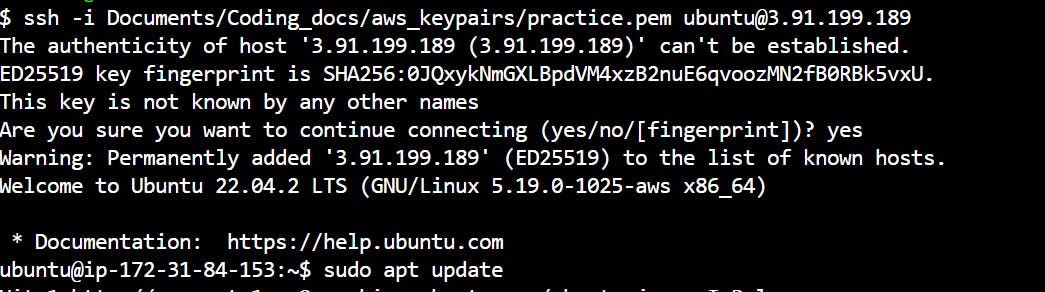
Step 3 -> SSH into the instance from your local device.
ssh path/to/pem/file ubuntu@<public-ip-addr>
# OR if you want to connect from ec2 instance, just click connect and connect
# to EC2 Instance.
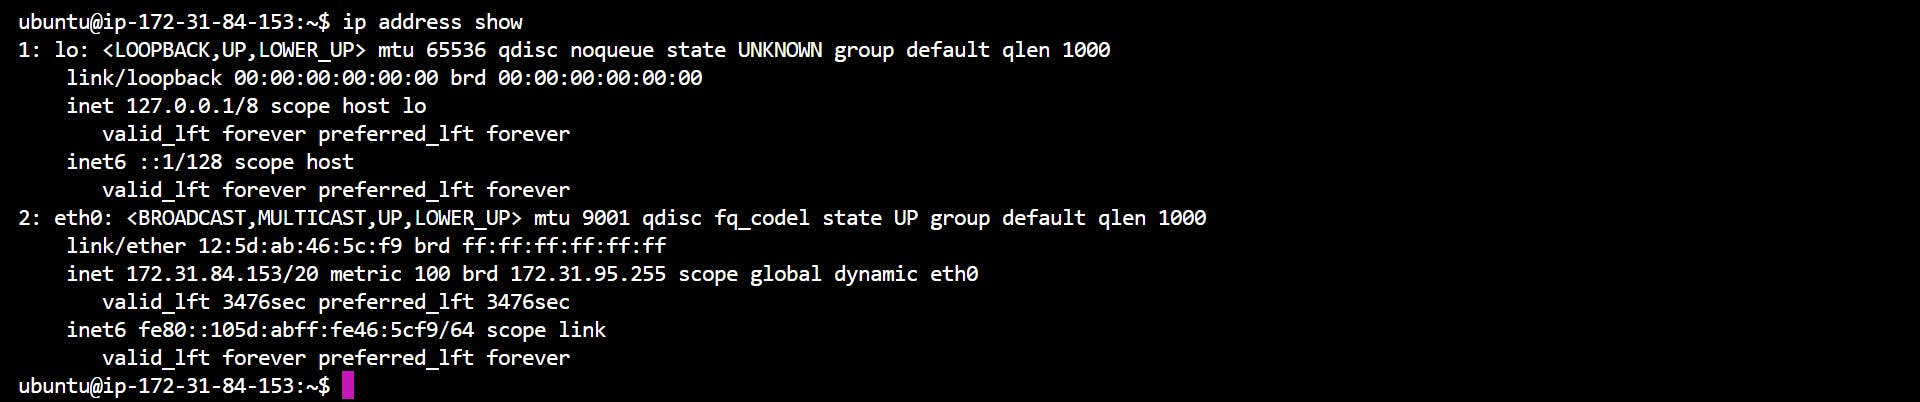
Step 4 -> Right now, we have only two kinds of networks in our ec2 instance. Loopback and eth0. Loopback is useful to test network connectivity. It is also known as localhost. Whereas, eth0 helps us to connect to the internet i.e. outside world
Docker Installation
Step 5 -> Let us install Docker on our machine and get started with the project.
sudo apt install docker.io -y

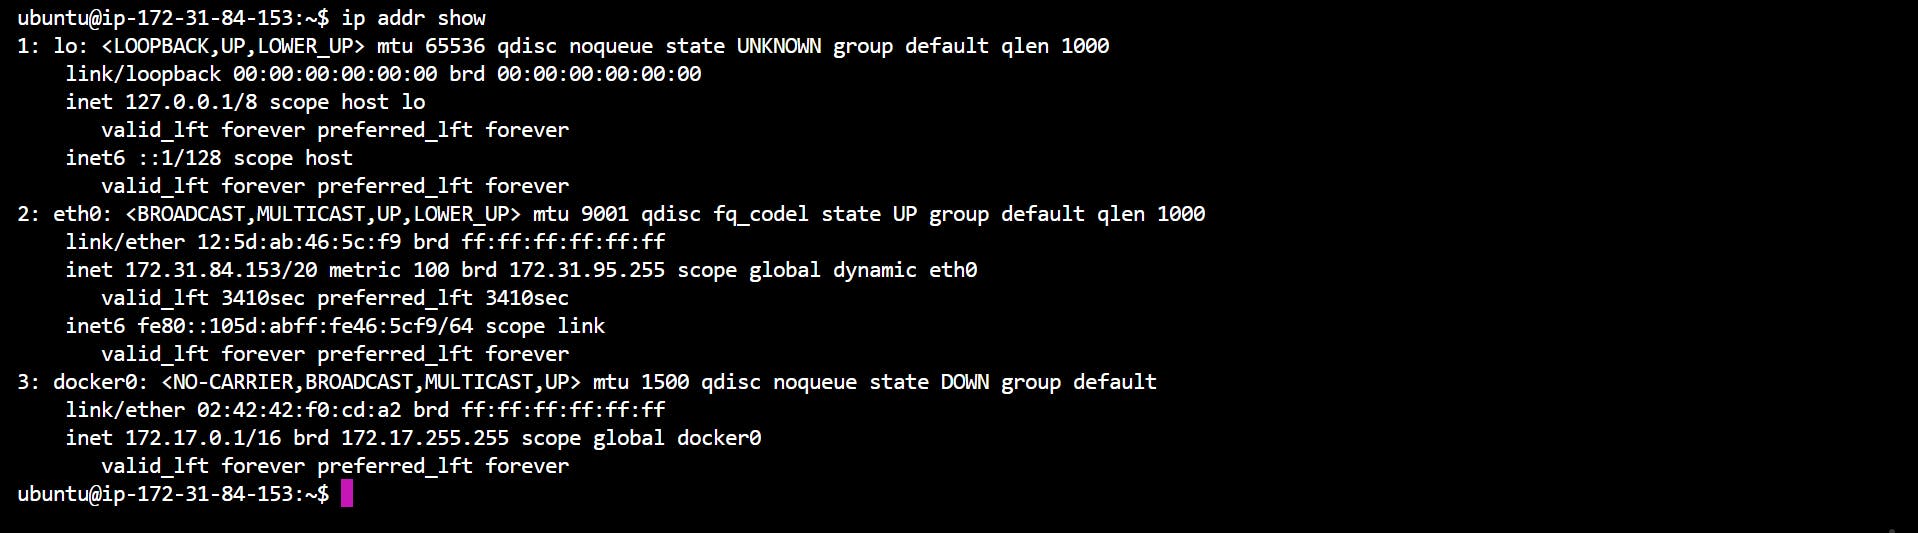
Step 6 -> Now, let us run the command, ip addr show You'll notice that the docker network is added to the networks group and as we create containers the veth network will be added to this group of networks.
Giving superuser access to Docker
Step 7 -> Now, let us check for the containers running on Docker.

Damn!, we faced an error.
Now, to watch the container running we can use sudo before using our command. But, how many times we will use sudo. Better, we can add us(i.e. ubuntu in my case) to Docker Group.
We can use the command,
sudo usermod -aG docker $USER
#we can use ubuntu instead of user. But, this command will run in all machines.
Step 8 -> After adding the user (ubuntu) to the Docker group. We must have to reboot our system. Using the command, sudo reboot
Step 9 -> Now, if we use docker ps we should not face any error and this should be our output.

Docker Networking
Step 10 -> Actually, there exist 7 types of Docker Networks. But, when we use the command docker network ls three types of networks can be seen.
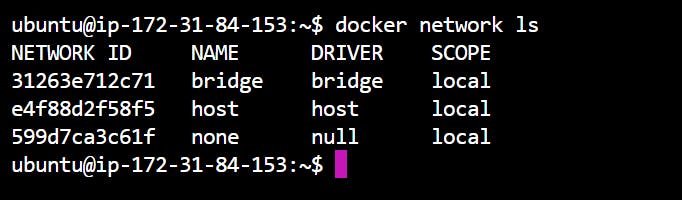
Type of Network: Default Bridge
Definition: Whenever we create our container, it is created in the bridge network. That is why the bridge network is also known as the default bridge network.
Step 11 -> Let us create a nginx container and see where it is getting created. Run the command to pull the nginx image,
docker run -d --name nginx nginx
#Here,
# -d is specifying that the container will run in detatched mode.
# and --name is used to specify the name of the container.
Here, we are using --name nginx to name our container and the last keyword nginx is the image name, which is nginx in our case.

Step 12 -> Now, let us go inside the container and check if we can ping the outside world or not.

Oh! we can connect to the outside world. Right now we are in the Container we created. But this container can ping the internet outside the container, but unable to listen.

So, let us delete this container and create a container, which can listen to the outside internet.
Step 13 -> To delete the container, we can use the command,
docker kill <container id> followed by docker rm <container id>

Step 14 -> Now, we will create a container by specifying the port number on which nginx listens. We can use the command,
#Try writing the command by yourself.
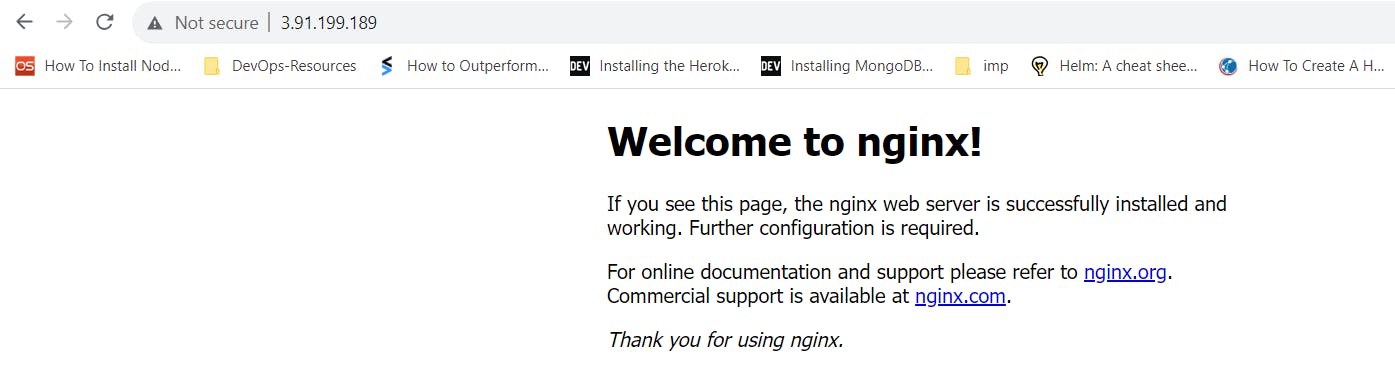
docker run -d --name nginx-cont -p 80:80 nginx
Here, we are mapping our host to our container (host:container) on port 80. So, the network is going through the host to the outside world and listening on port 80.
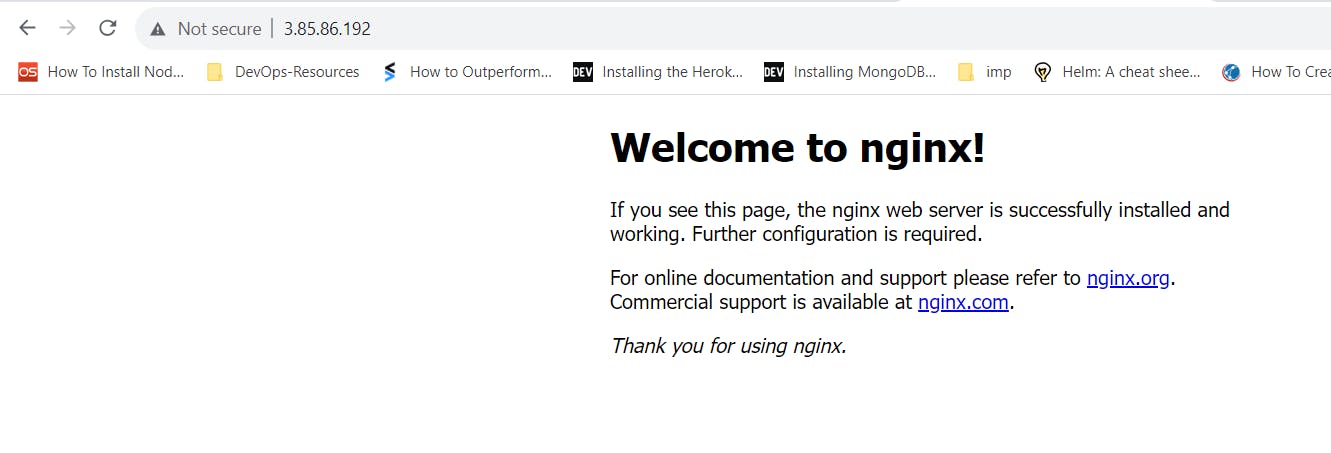
Now, if you check on the browser. The nginx message will be reflected. Which means our container is listening on port 80.
Okay, so till now we have covered the default type of network which is the Bridge network.
Step 15 -> Now, if you want to verify that the container lies in the default network. Run the command, docker inspect bridge . You'll get the output like,

Type of Network: Custom
Let us move ahead with the second type of network, the Custom Network.
Definition: It is the network created by the developer which is used to create an isolated environment. In which the running container can interact with each other. But cannot interact with a container that lies in the default network OR a container that lies outside the custom network.
Step 16 -> In this section, we will create our own network named "my-net". Using command, docker network create <network-name> .
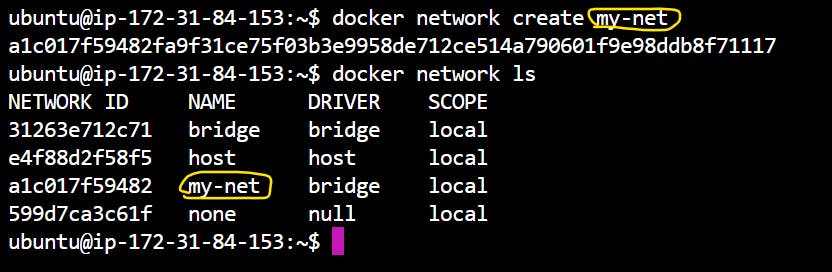
Step 17 -> Our purpose here is will create two containers and keep them in the "my-net" custom network and on the other hand we will create an nginx container on the default bridge network. And then we will try to ping the container that exists in the default bridge from the container in the custom bridge. That's it. Let's do it.
Right Now, we have one container running which is mapped with the host at port number 80. Now, we will remove this container. And create another container that will not be listening.

The commands required are as follows,
docker ps
docker kill <container-id>
docker rm <container-id>
docker ps
docker run -d --name <container-name> <image>
docker run -d --name nginx-in-default-net nginx
Till now, we have just deleted our container and created a new one.
Step 18 -> Now, let us create two nginx containers in our custom network.
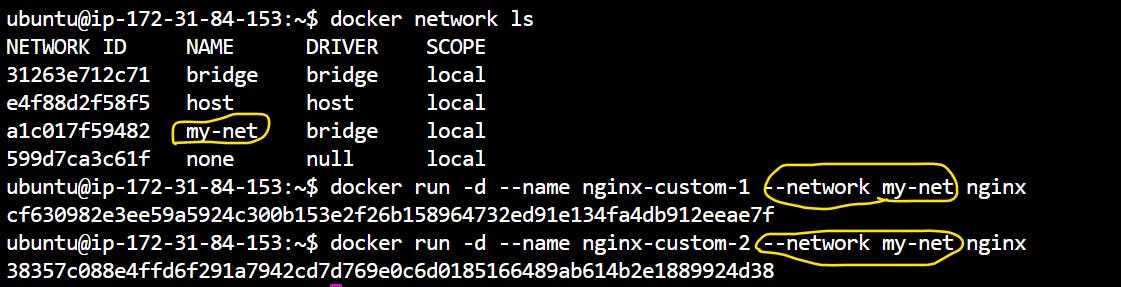
As earlier, we have created our network named "my-net" We will create and run two nginx containers in this network.
To verify that the nginx containers are created in our custom network, we can simply use the command docker inspect <network-name> in our case, docker inspect my-net

And here, we can see that the two containers are added to our custom network.
Let us now do a microservice project and implement a 2 or 3-tier application in our created network.
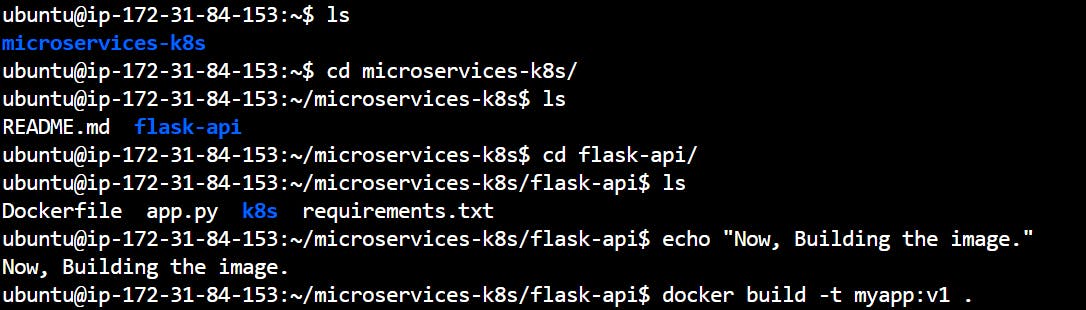
Clone this repository, git clone https://github.com/LondheShubham153/microservices-k8s.git in the EC2 instance.
Here, we will create a Dockerfile (which is created by Shubham Sir already). Followed by build it, then run it in the container. After cloning the repo, change your directory to flask-api dir. And build the image. Using command docker build -t my-app:v1 . Note: the . is not a full stop here. It shows the path of Dockerfile to Docker.
The success message will look like this.

Now, let us boot up the container, using the command
docker run -d -p 5000:5000 --name microsvc-app-ctr --network my-net myapp:v1
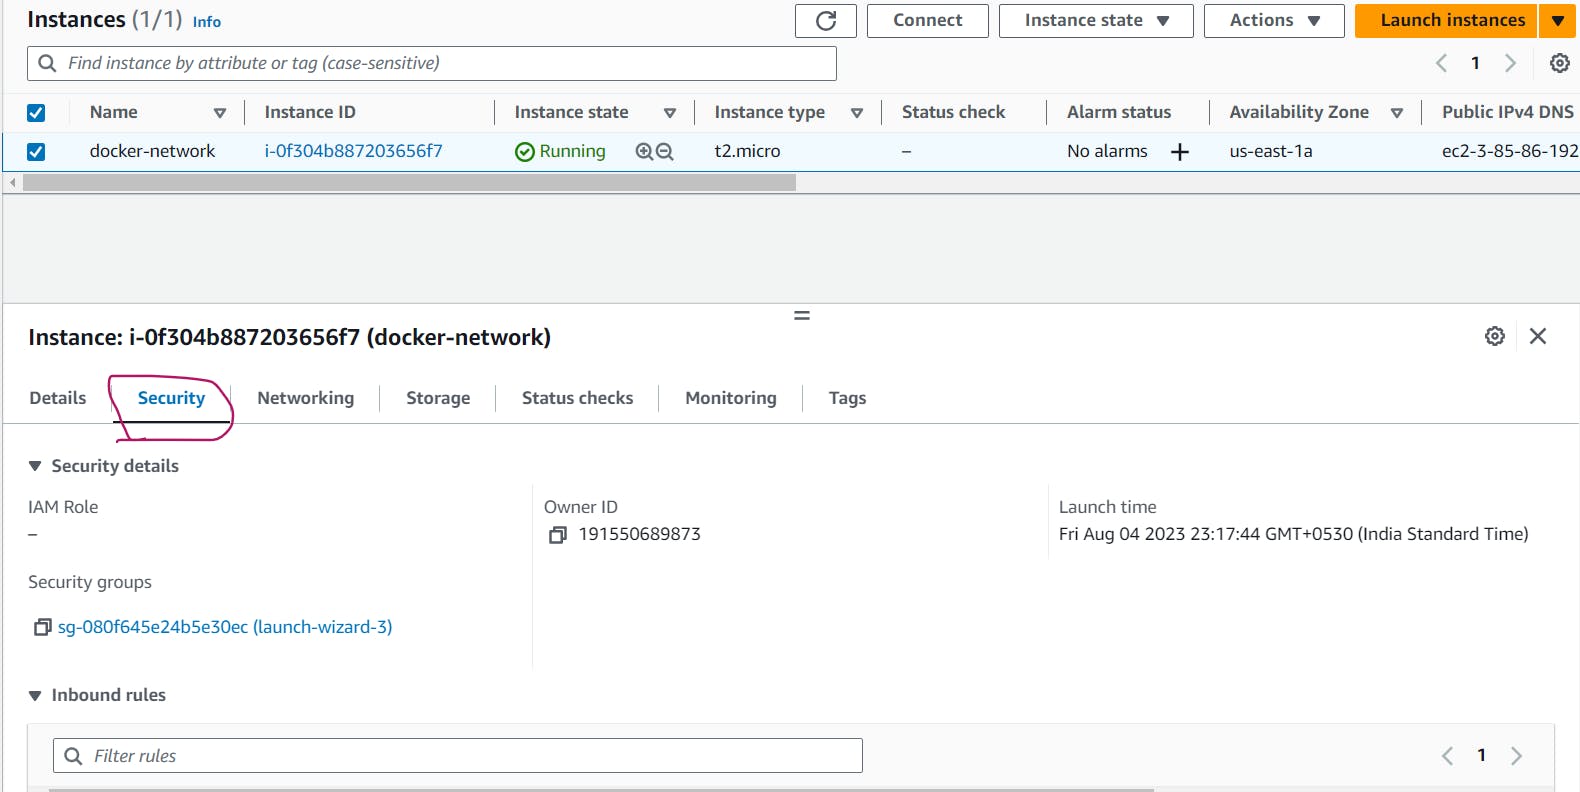
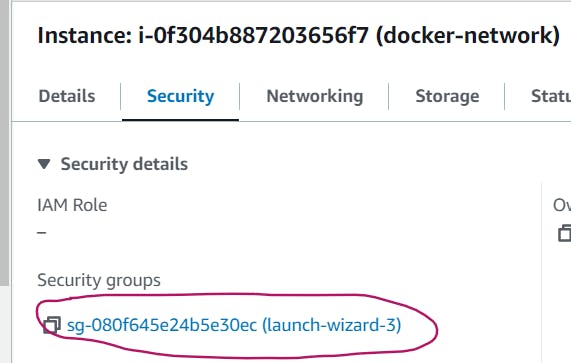
Step 19 -> Now, our app is listening on port 5000. But, we didn't have added the rule to allow traffic on port 5000 on our ec2 instance -> security group -> inbound rules. So, let us set up that.
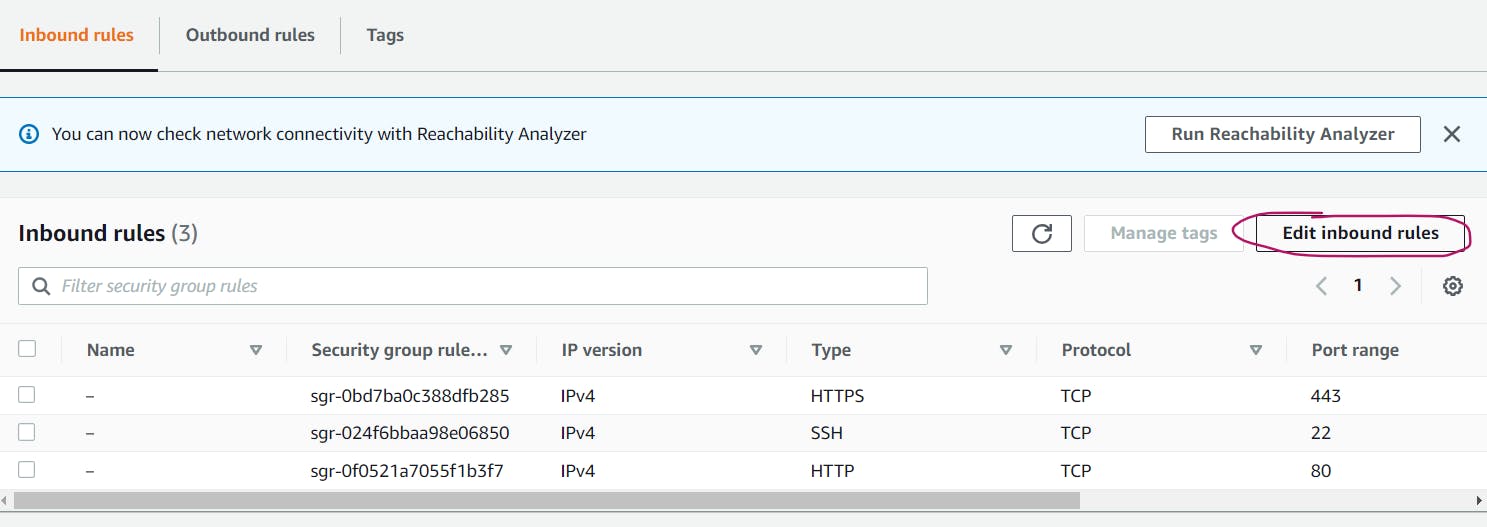

After, creating the rule, our app must be up. And it may look like the following picture.

Now, it is a moment of truth. Our app is running on port 5000 from the container that lies in our custom network.

And Boomm! Our container are isolated successfully.
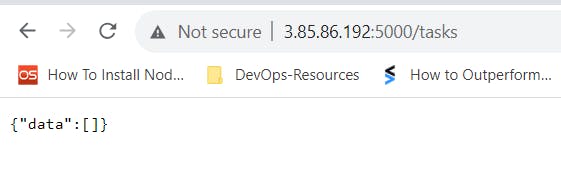
Okay, so right now, in our custom network we have nginx-custom-1, nginx-custom-2 and python app running. Now, let us add a Database Container of MongoDB to make it a 2-tier application. By using command, docker run --name mongo-custom --network my-net mongo

Now, as our mongo is added to the custom network. This link should be working. http://<ec2-instance-public-ip>:5000/tasks
Type of Network: Host
Step 20 -> Now, let us move ahead with the another kind of network which is host network. Here, we do not have to map our container port with the host port. Docker, by default uses the host IP address to listen at port we specified. If we were in Bridge(default) network our nginx container can ping to the data lies in outside world like google.com or so. But, the outside world cannot reach to our container.
Whereas in host network without mapping i.e. without "this -> -p 80:80", outside world can reach to our nginx container.
To boot up host container use command, docker run -d --name nginx-host --network host nginx

And this is how Host Network Works.
Type of Network: None
The last type of network of this blog is, None.
When we create a container in the "None" network mode, it doesn't have network connectivity. It is effectively isolated from external network communication.
Let us create a container and try to ping the contents outside the container.

Here, as you can see we are not able to establish the connection.
Similarly, when we want to access this container from the outside world.

Port 3000 is not assigned to the container because the container is in a None type of network.
That's all about Docker Networking from my side. Once I learn the further concepts of Docker Networking I will make Part-2 of this Blog.
Thank you for reading the Blog here.
Reference:
A Huge Thanks to Shubham Sir for providing us the in-depth knowledge of DevOps for free.